Chair exercises for seniors is a great way to gain strength in your core without over exerting your body. Using a simple chair can be a valuable tool for seniors aiming to maintain or even improve their strength and flexibility. Let’s dive into some engaging, fun, and, most importantly, safe exercises that can be done right from a chair.
Contents
- 1 Why Chair Exercises?
- 2 Top Benefits of Chair Exercises
- 3 Getting Started: The Basics Of Chair Exercises For Seniors
- 4 Top 5 Chair Exercises for Strength
- 5 Top 5 Chair Exercises for Flexibility
- 6 Making it a Habit
- 7 Safety First!
- 8 The Power of Perseverance
- 9 FAQs
Why Chair Exercises?
You might be asking, why focus on chair exercises? For seniors, the answer is clear: safety, accessibility, and effectiveness. Traditional workouts might be daunting or even hazardous for some elderly individuals. Chair exercises provide a secure way to engage muscles without the risk of falls.
Top Benefits of Chair Exercises
Remember when a simple task seemed so effortless? With regular chair exercises, seniors can regain some of that ease. Here are some amazing perks:
- Muscle Maintenance: Helps in retaining muscle mass, which naturally decreases with age.
- Joint Flexibility: Keeps the joints fluid, reducing the chances of arthritis.
- Improved Balance: Lowers the risk of falls and subsequent injuries.
Getting Started: The Basics Of Chair Exercises For Seniors
Ever heard the saying, “You must walk before you run?” Chair exercises are like that. Starting slow is the key.
Embarking on the journey of chair exercises can be a game-changer for many seniors. These exercises combine safety, accessibility, and efficiency, providing an optimal fitness regimen for the elderly. Before diving into the world of chair workouts, there are some fundamentals that can make this experience even more beneficial.
1. Choosing the Right Chair
The foundation of all chair exercises lies in the chair itself. When choosing a chair:
- Stability is Key: Opt for a chair with sturdy legs and no wheels. This ensures that the chair won’t slip or move during exercises.
- Back Support: Chairs with a straight back will aid in maintaining posture.
- Avoid Armrests: While not a strict rule, chairs without armrests tend to offer more range for movement.
2. Proper Clothing
Wearing the right attire can make a huge difference:
- Comfort Over Fashion: Loose-fitting clothes that allow easy movement are preferred.
- Safe Footwear: Non-slip shoes or sneakers that offer good grip will prevent any accidental slips.
3. Setting the Mood
Creating a conducive environment can enhance the exercise experience:
- Well-lit Room: Ensure the room has adequate lighting to see clearly.
- Open Space: Even though you’re seated, it’s essential to have enough space around you to perform the exercises without hindrance.
- Music: Playing some light, motivating tunes can set a positive tone for the workout.
4. Warm-Up is Essential
Before starting any exercise routine, warming up the body is crucial. Simple neck rotations, arm stretches, and ankle twirls can prep the body, increasing blood flow to the muscles and reducing the risk of injuries.
5. Listen to Your Body
This isn’t a race. It’s essential to recognize and respect the body’s signals. If any exercise feels straining or induces pain, it’s crucial to stop and reassess. Starting with shorter sessions and gradually increasing the duration can also be a gentle way to introduce the body to the new routine.
6. Stay Hydrated
Water is the elixir of life. Keeping a bottle of water nearby and taking small sips throughout the session helps in staying hydrated and flushing out toxins.
7. Consistency is Key
Like any fitness regimen, consistency plays a pivotal role in seeing tangible results with chair exercises. Setting specific days and times in the week for these exercises can help in forming a routine.
By paying attention to these basics, seniors can harness the full potential of chair exercises, ensuring not just a physically rewarding experience but also one that is enjoyable and uplifting.
Top 5 Chair Exercises for Strength
For seniors, maintaining muscle strength is essential for daily activities and overall health. Chair exercises have emerged as a safe and effective method to build strength without putting undue strain on joints. Let’s dive into the top 5 chair exercises for strength for seniors.
Seated Marches
Seated marches, though a simple sounding exercise, are incredibly beneficial, especially for seniors. This straightforward, low-impact activity offers a way to engage multiple muscle groups from the safety of a chair. Whether you’re new to chair exercises or just want to refine your technique, understanding the intricacies of seated marches can elevate its effectiveness.
What are Seated Marches?
Seated marches involve lifting your knees alternately, mimicking the motion of marching, but while seated. They are an excellent cardiovascular exercise, helping to raise the heart rate, and also work on lower body strength.
Benefits of Seated Marches
- Cardiovascular Health: This exercise gets the blood pumping, which is great for heart health.
- Lower Body Strength: It engages the quadriceps, hamstrings, and calf muscles, promoting lower body strength.
- Core Engagement: Believe it or not, keeping a straight posture during this exercise can give your core a slight workout too.
- Joint Mobility: Regularly performing seated marches can enhance the flexibility and mobility of the hip and knee joints.
How to Perform Seated Marches Correctly
- Positioning: Sit tall in a sturdy chair with a straight back. Ensure both feet are flat on the ground and hands resting on the thighs or sides of the chair for support.
- The Motion: Lift your right knee towards your chest, as high as is comfortable. As you lower your right leg, raise your left knee. The movement should be controlled, not jerky.
- Breathing: It’s essential to maintain a steady breathing rhythm. Inhale when lifting a leg and exhale when lowering it.
- Posture: Keep your back straight and avoid leaning too far back. Engaging the core will help maintain this posture.
- Intensity: To increase the intensity, quicken the pace or add light ankle weights.
Modifications and Tips
- Arm Engagement: To involve the upper body, raise the opposite arm while lifting a knee. This mimics a natural marching motion.
- Foot Flexion: While lifting your knee, flex your foot for additional calf muscle engagement.
- Stay Aware: It’s easy to become complacent with such a simple exercise. Focus on the movement, ensuring you’re lifting your knees high enough to challenge yourself but without straining.
Safety Precautions
- Always ensure the chair is on a non-slippery surface.
- If any discomfort or pain is felt, stop the exercise and consult with a health professional.
- For those with existing joint issues, it might be beneficial to start with a lower range of motion and gradually increase as comfort allows.
Incorporating seated marches into a regular fitness routine can offer seniors a balanced blend of cardiovascular health, strength, and flexibility benefits. Remember, it’s not about how fast or high you can go, but consistency and proper technique that make all the difference.
Chair Squats
Chair squats, a quintessential exercise for enhancing leg strength and improving balance, are ideal for seniors as they merge the advantages of traditional squats with the security and support of a chair. Given the importance of leg strength in maintaining mobility and independence, understanding and mastering this exercise can have profound effects on one’s daily life.
What are Chair Squats?
At the fundamental level, a chair squat is akin to the motion of sitting down and standing up. The chair serves as a guide and support, ensuring the squat is performed at a safe depth and with proper form.
Benefits of Chair Squats
- Leg and Core Strength: This exercise primarily targets the quadriceps, hamstrings, and glutes. Simultaneously, the core is engaged to maintain balance and posture.
- Improved Balance: Regularly practicing chair squats can enhance one’s balance, reducing the risk of falls.
- Joint Health: They promote healthy knee and hip joint functions, which can be instrumental in day-to-day movements.
How to Perform Chair Squats Correctly
- Positioning: Start by standing in front of a sturdy chair, feet hip-width apart.
- The Descent: Slowly bend your knees, pushing your hips back as if you are about to sit. Your arms can be extended in front for balance. Keep the chest lifted and back straight.
- Touchdown: Lightly touch the chair with your buttocks, ensuring you don’t fully sit or rest.
- The Ascent: Push through your heels, engaging the leg muscles, and return to a standing position.
- Breathing: Inhale as you lower down and exhale as you rise.
Modifications and Tips
- Depth Adjustment: Based on comfort, you can use cushions to raise the seat height initially, and gradually remove them as you gain strength and confidence.
- Stance Variation: Widening the stance can help those with hip or knee discomfort.
- Arm Engagement: Holding light weights can integrate an upper-body workout.
Safety Precautions
- Opt for a stable, non-wheeled chair.
- Wear non-slip shoes to prevent any accidents.
- If there’s any pain or discomfort, it’s essential to reassess the form or consult with a professional.
With time and practice, chair squats can be a formidable tool for seniors, offering both strength and functional benefits. When executed with attention to form and regularity, they can be a foundational exercise for maintaining a healthy and active lifestyle.
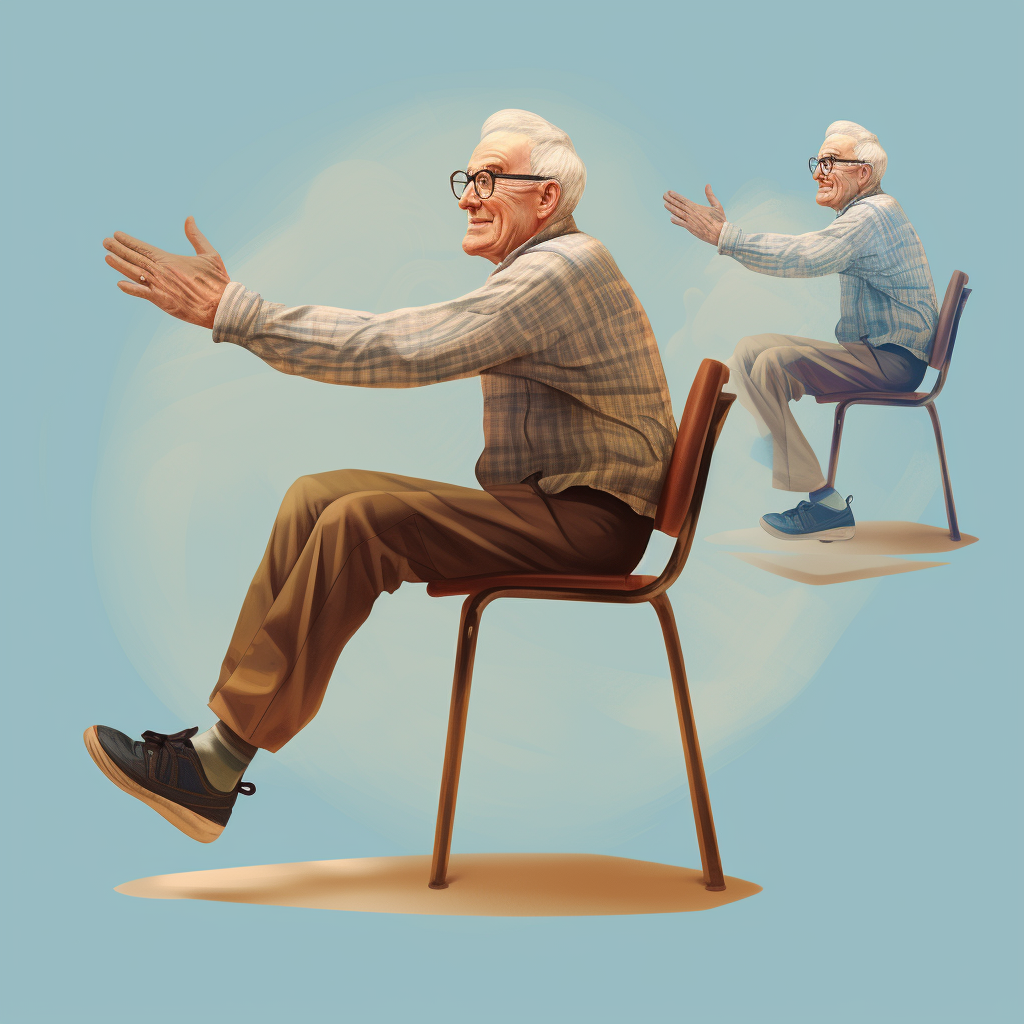
Seated Leg Lifts
Seated leg lifts, a blend of simplicity and efficacy, provide seniors with an excellent way to enhance lower body strength without the need for extensive equipment or space. These exercises focus on the muscles of the legs, primarily the quadriceps (front thigh muscles), while also offering benefits for balance and joint health. Here’s a deep dive into the world of seated leg lifts.
What are Seated Leg Lifts?
While seated, leg lifts involve raising one leg straight out in front without letting the foot touch the ground and then lowering it back down. This controlled movement challenges the muscles, promoting strength and endurance.
Benefits of Seated Leg Lifts
- Quadriceps Strength: This primary muscle group is vital for many daily activities like walking and climbing stairs.
- Improved Joint Mobility: Regular movement can aid in knee joint flexibility.
- Balance and Stability: As the core is engaged to maintain posture during the movement, seated leg lifts can help in improving balance and stability.
How to Execute Seated Leg Lifts Properly
- Positioning: Begin by sitting firmly in a stable chair with your feet flat on the ground. Keep your back straight, and hands resting on the sides of the chair or on your lap.
- The Lift: With a straight leg, slowly lift one foot off the ground, raising it as high as comfortably possible. Keep the foot flexed (toes pointing back towards you).
- Holding the Pose: For an added challenge, hold the lifted position for a few seconds before slowly lowering the leg back down.
- Repetition: After a set number of repetitions on one leg, switch to the other.
- Breathing: Inhale as you lift the leg and exhale as you lower it.
Modifications and Tips
- Range of Motion: For those starting out or with limited mobility, a smaller range of motion can be used. Gradually increase as strength and flexibility improve.
- Ankle Weights: For a more challenging workout, consider adding light ankle weights.
- Engage the Core: Actively engage the core muscles during the lift to improve stability and posture.
Safety Precautions
- Ensure you’re seated in a sturdy, non-wheeled chair.
- If experiencing any pain, especially in the knee joint, stop the exercise and consult a health professional.
- Avoid using momentum. The movement should be controlled and deliberate.
Seated leg lifts, with their accessibility and effectiveness, can serve as a cornerstone for seniors aiming to maintain leg strength and mobility. As with any exercise, consistency is key, and even a few minutes a day can yield noticeable improvements over time.
Seated Tummy Twists
Seated tummy twists, sometimes also known as seated Russian twists, stand out as a favored exercise among seniors for targeting the core, especially the oblique muscles. The beauty of this exercise is its adaptability; it can be as gentle or challenging as needed, making it a versatile addition to any fitness routine. Let’s delve into the nuances of seated tummy twists.
What are Seated Tummy Twists?
While sitting, this exercise involves twisting the upper body from side to side, often with a weight or object to hold, focusing on engaging the abdominal and oblique muscles.
Benefits of Seated Tummy Twists
- Core Strengthening: This exercise robustly targets the abdominals and obliques, which are essential for posture, balance, and daily movements.
- Enhanced Flexibility: The twisting motion can help improve the flexibility of the spine and upper body.
- Postural Benefits: Regular engagement of core muscles contributes to a better posture.
Executing Seated Tummy Twists Properly
- Positioning: Sit up tall in a sturdy chair with feet flat on the ground. Maintain a slight lean back at a comfortable angle, ensuring the back is straight.
- Holding an Object: Grasp a lightweight object, like a water bottle or a dumbbell, with both hands in front of you.
- The Twist: Keeping the hips and lower body stationary, rotate your upper body to one side, bringing the weight towards that side. Return to the center and repeat on the opposite side.
- Breathing: Exhale during the twist and inhale as you return to the center.
Modifications and Tips
- Adjusting Intensity: The exercise can be performed without weights for those just starting out. As strength improves, consider increasing the weight for added challenge.
- Engaging the Core: It’s vital to actively engage the core throughout the exercise. Imagine drawing your belly button towards your spine.
- Limiting Range: If full twists are uncomfortable, consider reducing the range of motion and focusing on the engagement of the core.
Safety Precautions
- Use a stable, non-wheeled chair to ensure safety.
- Movements should be controlled; avoid using momentum to twist.
- Those with back issues should approach this exercise with caution and consult with a health professional if unsure.
The seated tummy twists, when integrated into a regular routine, can be instrumental in strengthening the core and enhancing flexibility for seniors. As with any exercise, it’s essential to listen to the body and prioritize form over the number of repetitions or the weight used. With patience and persistence, this exercise can be a significant step towards improved core strength and overall well-being.
Overhead Arm Raises
Overhead arm raises, straightforward yet impactful, are a staple exercise that focuses on the deltoids — the muscles that cap the shoulders. For seniors, they not only bolster upper body strength but also enhance mobility and range of motion in the shoulder joint. Let’s take a detailed look at the value and methodology of overhead arm raises.
What are Overhead Arm Raises?
This exercise consists of lifting both arms or one arm at a time overhead, typically holding a light weight, from a position where the arms are by your sides or in front of you.
Benefits of Overhead Arm Raises
- Shoulder Strength: They primarily work on the deltoids, aiding in lifting and reaching movements.
- Improved Mobility: Regularly doing these raises can help increase the shoulder joint’s range of motion.
- Postural Benefits: Strengthening the shoulder region can contribute to an upright and more confident posture.
Executing Overhead Arm Raises Properly
- Starting Position: Sit tall in a stable chair, feet flat on the ground. Hold a light weight in each hand, with arms by your sides or extended in front of you at shoulder height.
- The Lift: Keeping your arms straight, slowly raise them above your head until they’re fully extended or as far as is comfortable.
- Lowering Down: With control, lower the weights back to the starting position.
- Breathing: Inhale as you lift the weights and exhale as you bring them down.
Modifications and Tips
- Intensity Adjustment: Begin with no weights, using just the resistance of your arms. As strength progresses, introduce light dumbbells or household objects like water bottles.
- Alternate Arms: If lifting both arms simultaneously is challenging, start by raising one arm at a time.
- Engage the Core: Activate your core muscles to maintain stability and ensure an erect posture during the exercise.
Safety Precautions
- Choose a sturdy, non-wheeled chair for support.
- Avoid locking the elbows when arms are overhead.
- Maintain a steady pace. It’s essential to prioritize control over speed.
- If there’s any discomfort or pain in the shoulder joints, it’s crucial to either adjust the form or consult with a health professional.
Overhead arm raises, with their dual benefits of strengthening and enhancing mobility, are a must-have in the fitness toolkit for seniors. Regular practice, combined with attention to form, can pave the way for stronger shoulders, improved posture, and a broader range of motion, making daily tasks like reaching and lifting noticeably easier.
Top 5 Chair Exercises for Flexibility
Flexibility is a cornerstone of mobility and overall well-being, especially for seniors. Chair exercises provide a gentle yet effective approach to enhance flexibility, ensuring joints remain supple and movements remain fluid. Let’s take a look at the top 5 chair exercises for flexibility for seniors.
Ankle Circles
Ankle circles might sound deceptively basic, but their benefits are vast, especially for seniors. As the name suggests, the exercise involves drawing circles with the feet by rotating the ankles. With age, maintaining ankle flexibility and strength becomes paramount, not just for movement but also for overall foot health and balance. Dive into the nuances of ankle circles and understand their profound impact.
What are Ankle Circles?
In this exercise, individuals rotate their ankles, moving their feet in a circular motion, either clockwise or counter-clockwise, without moving the leg.
Benefits of Ankle Circles
- Flexibility: Regular rotation can help in maintaining and improving the range of motion of the ankle joint.
- Strength: Circles help in strengthening the muscles around the ankles, aiding in better support and stability.
- Circulation: The movement promotes better blood flow to the feet, which can be beneficial for those with circulatory issues.
- Reduction in Stiffness: Regular movement can help in reducing the morning stiffness many seniors experience.
Performing Ankle Circles Properly
- Starting Position: Sit comfortably on a chair, keeping one foot flat on the ground.
- Lift & Rotate: Lift the other leg slightly off the ground and begin rotating the foot in a circular motion.
- Direction Change: After a set number of rotations, switch direction from clockwise to counter-clockwise or vice versa.
- Switch Foot: After completing rotations in both directions, switch to the other foot.
- Breathing: Maintain steady and relaxed breathing throughout the exercise.
Modifications and Tips
- Lying Down: Ankle circles can also be performed lying down, which might be comfortable for some individuals.
- Intensity: To add a challenge, consider using a light ankle weight.
- Consistent Movement: Aim for smooth, continuous rotations rather than jerky movements.
Safety Precautions
- Ensure you’re seated securely, using a stable, non-wheeled chair.
- If there’s any discomfort, pain, or popping sounds in the ankle during the exercise, it’s advisable to stop and seek medical advice.
- Maintain a gentle motion; forceful or overly aggressive rotations could lead to strain.
Incorporating ankle circles into daily routines can provide seniors with improved ankle health, reduced chances of injuries, and better overall mobility. Like all exercises, consistency is key. With the low-impact and simplicity of ankle circles, they can easily be integrated into any part of the day, ensuring healthier and more flexible ankles in the long run.
Seated Forward Bend
The Seated Forward Bend, known in yoga parlance as “Paschimottanasana,” is a potent stretch that primarily targets the hamstrings and back. For seniors, it offers an opportunity to enhance flexibility, alleviate tension, and foster relaxation. Let’s unravel this age-old posture and explore its intricacies for an elderly demographic.
What is the Seated Forward Bend?
In this exercise, one sits with legs extended straight out, then bends forward from the hips, aiming to reach the toes or as far as comfortably possible, while maintaining a straight back.
Benefits of Seated Forward Bend
- Hamstring Flexibility: A primary target of this stretch, elongated hamstrings can reduce the risk of back issues and improve overall mobility.
- Spinal Release: As the back stretches, tension held in the spinal muscles can dissipate, fostering relaxation.
- Improved Digestion: Bending forward can stimulate abdominal organs, aiding digestion.
- Calming Effects: The forward bend has a naturally calming effect on the mind and nervous system.
Executing Seated Forward Bend Properly
- Starting Position: Sit tall on a firm surface, legs extended straight in front. Feet are flexed.
- The Bend: Inhale deeply, and as you exhale, hinge at the hips and bend forward. Aim to keep the spine long rather than rounding the back.
- Position Holding: Reach towards the feet. If the toes are inaccessible, rest hands on the shins or thighs. Hold for a few breaths, then inhale as you come up.
- Breathing: It’s vital to maintain steady, deep breaths, which can further the stretch and enhance relaxation.
Modifications and Tips
- Using Props: A strap or towel can be looped around the feet, providing an extended grip and aiding the stretch.
- Bent Knees: For those with tight hamstrings, a slight bend in the knees can make the pose more accessible.
- Focus on the Spine: The goal isn’t necessarily to touch the toes but to stretch with a long spine.
- Limit the Depth: Only bend as far forward as is comfortable. Over time, flexibility may increase.
Safety Precautions
- Engage in this exercise on a non-slip surface to ensure stability.
- If any sharp pain is experienced, particularly in the back, it’s essential to stop and, if persistent, consult a medical professional.
- It’s always beneficial to warm up with some gentle stretches before engaging in deeper poses.
The Seated Forward Bend is more than just a physical stretch; it’s a journey into inner calm and increased flexibility. For seniors, regular practice can be transformative, offering a tangible boost in mobility and a subtle one in tranquility. Like any exercise, it’s important to approach it with patience, letting the body dictate the pace and depth of the stretch.
Neck Stretch
The neck, a pivotal yet often overlooked part of our anatomy, bears the weight of the head and facilitates its wide range of motions. Due to prolonged postures, stress, or age-related factors, the neck can accumulate tension, making neck stretches paramount, especially for seniors. This gentle exercise can offer relief, restore mobility, and improve overall neck health.
What is the Neck Stretch?
Neck stretching involves controlled movements or postures where the neck is tilted, turned, or rotated, aiming to stretch various muscle groups within the neck region.
Benefits of Neck Stretch
- Tension Relief: Regular stretching can alleviate built-up tension, potentially reducing instances of neck pain.
- Increased Mobility: By improving flexibility in the neck muscles, the range of motion can be enhanced.
- Headache Reduction: Tension in the neck can lead to tension headaches. Stretching may help in prevention.
- Improved Posture: Keeping the neck muscles supple can contribute to better overall posture.
Executing Neck Stretches Properly
- Starting Position: Sit or stand upright, ensuring the spine is straight and shoulders are relaxed.
- Tilting: Gently tilt the head to one side, bringing the ear towards the shoulder until a stretch is felt on the opposite side.
- Rotation: Turn the head slowly to look over one shoulder, holding the position to stretch the side of the neck.
- Chin to Chest: Bring the chin down towards the chest, feeling the stretch along the back of the neck.
- Holding & Repeating: Each stretch should be held for 15-30 seconds, and repeated 2-3 times per side.
- Breathing: Maintain slow, steady breaths throughout, enhancing relaxation and stretch effectiveness.
Modifications and Tips
- Hand Assistance: For a deeper stretch, the hand can be placed on the head to apply gentle pressure, but ensure not to force the neck.
- Eye Movement: Moving the eyes in the opposite direction of the stretch can sometimes intensify the sensation.
- Limit Strain: The stretches should be executed gently, without any jerky movements or excessive force.
Safety Precautions
- If there’s any history of neck injury or surgery, it’s crucial to consult a healthcare professional before starting any neck stretches.
- Any sharp pain or discomfort is a signal to stop the stretch immediately.
- Avoid rolling the neck backward as it can place undue strain on the cervical spine.
Incorporating neck stretches into daily routines, especially for seniors, can be a gateway to reduced tension, fewer discomfort episodes, and a more flexible, responsive neck. The exercises are simple, require no equipment, and can be done virtually anywhere, making them a convenient tool for maintaining neck health and overall well-being.
Shoulder Rolls
Tension often accumulates in our shoulders, a hub of both physical and emotional stress. Especially for seniors, where muscles may be prone to stiffness due to reduced mobility or age-related factors, simple exercises like shoulder rolls can make a difference. By providing relief, enhancing flexibility, and revitalizing the upper body, shoulder rolls are an exercise par excellence.
What are Shoulder Rolls?
A basic yet effective movement, shoulder rolls involve lifting, rotating, and dropping the shoulders in a circular motion, either forwards or backwards.
Benefits of Shoulder Rolls
- Stress Release: The rolling action helps in breaking up and releasing accumulated tension in the shoulder region.
- Improved Mobility: Regular execution can boost flexibility, allowing for a wider and more comfortable range of shoulder movements.
- Posture Correction: Engaging in shoulder rolls can promote better posture, reminding individuals to maintain an upright stance.
- Enhanced Blood Flow: The rhythmic motion can stimulate circulation in the upper body, nourishing muscles and joints.
Executing Shoulder Rolls Properly
- Starting Position: Stand or sit upright, ensuring a straight spine. Keep feet shoulder-width apart if standing.
- The Roll: Lift the shoulders towards the ears, then rotate them backwards or forwards, drawing a circle.
- Repetition: Engage in a set of 10-15 rolls in one direction before switching to the other.
- Breathing: Inhale when lifting the shoulders and exhale when releasing them down.
Modifications and Tips
- Varying Speed: Execute rolls at varying speeds, from a gentle pace to a more dynamic roll, to engage different muscles.
- Arm Integration: Extend arms outward and follow the shoulder motion, creating larger circles for a deeper stretch.
- Focus on Fluidity: Aim for smooth and controlled movements, avoiding any jerkiness.
Safety Precautions
- Be cautious if there’s a history of shoulder issues or injuries; consult with a healthcare professional if unsure about the exercise’s suitability.
- Any sharp pain or unusual discomfort during the exercise signals the need to pause and possibly reassess the technique.
- Ensure a safe environment; if standing, maintain a stable footing to prevent any accidental slips or falls.
Shoulder rolls, in their simplicity, are an elegant solution to a common problem. For seniors, incorporating them into daily routines can mean fewer instances of shoulder stiffness, reduced tension, and a more limber and comfortable upper body. The beauty of this exercise lies in its accessibility — it requires no equipment, minimal space, and can be done anytime, anywhere. Shoulder rolls thus stand as a testament to the principle that sometimes, the simplest exercises can offer the most profound benefits.
Seated Spinal Twist
Amidst a plethora of exercises catering to various parts of our body, the seated spinal twist shines for its profound impact on the spine and surrounding muscles. Especially for seniors, whose spinal health might decline due to age or reduced physical activity, this exercise offers a combination of flexibility, strength, and relaxation. Let’s delve into this transformative movement.
What is the Seated Spinal Twist?
The seated spinal twist, known in the yoga community as “Ardha Matsyendrasana,” involves sitting upright, bending one leg, crossing the other over, and twisting the torso towards the bent knee, creating a rotation in the spine.
Benefits of Seated Spinal Twist
- Spinal Health: The twisting motion aids in realigning and lengthening the spine, promoting better posture and spinal health.
- Digestive Boost: The exercise can stimulate abdominal organs, potentially aiding digestion and detoxification.
- Muscular Flexibility: Engaging in this twist stretches the back, shoulders, hips, and glutes, promoting overall flexibility.
- Tension Release: The rotation helps in releasing accumulated tension in the back and shoulders.
Executing Seated Spinal Twist Properly
- Starting Position: Sit upright on a firm surface with legs extended in front.
- Positioning the Legs: Bend one knee and place the foot on the outside of the opposite thigh. The other leg can be kept straight or bent, with its foot close to the opposite hip.
- The Twist: Turn the torso towards the bent knee. Use the opposite arm or elbow to apply gentle pressure on the bent knee, enhancing the twist.
- Holding the Pose: Maintain the twist for 15-30 seconds, breathing deeply.
- Switching Sides: Slowly return to the center and repeat on the opposite side.
Modifications and Tips
- Arm Placement: The arm on the twisting side can either rest behind as a support or can be used to intensify the twist.
- Eye Movement: Turning the head in the direction of the twist can further enhance its benefits.
- Maintain Erect Spine: Ensure the spine remains straight throughout the exercise, preventing any slouching.
Safety Precautions
- If there’s any history of severe back or hip issues, consultation with a healthcare professional is recommended before attempting the twist.
- Sharp pain or significant discomfort during the movement is a cue to stop immediately.
- Never force the twist; the rotation should be gentle, and it’s crucial to listen to one’s body, only going as far as feels comfortable.
Regularly incorporating the seated spinal twist into fitness routines can offer seniors a holistic mix of benefits, from muscle toning to relaxation. By prioritizing spinal health, this exercise not only targets the physical backbone of our bodies but also reinforces the backbone of a robust, age-friendly fitness regimen. The seated spinal twist is a reminder that flexibility and strength can, and often do, go hand in hand.
Making it a Habit
Do you remember your grandma’s favorite saying about practice making perfect? With chair exercises, consistency is the secret sauce. Aim for 15-20 minutes daily, and soon, the benefits will start rolling in.
Safety First!
Like grandma always said, “Better safe than sorry!” Always prioritize safety. If a move feels uncomfortable or painful, stop immediately. And consulting with a healthcare professional before starting any new exercise regimen is always a smart move.
The Power of Perseverance
Chair exercises might sound simple, but with regular practice, the difference they make can be profound. It’s like watering a plant daily; the growth might not be visible immediately, but it’s certainly happening. So, to all the seniors out there, remember: the power to a stronger, more flexible you might just be in that chair you’re sitting on!
In conclusion, chair exercises for seniors is more than just a workout; it’s a lifestyle change, a step towards a healthier, happier, and more independent life. Need some more exercises to try? Don’t forget to check out our article about pool exercises for seniors.
FAQs
- Q: Can these exercises be done daily? A: Yes, but always listen to your body and take rest days if needed.
- Q: What if I feel pain during an exercise? A: Stop immediately and consult a professional. Pain indicates something might be wrong.
- Q: How long before I see benefits? A: It varies, but with consistency, benefits can be noticed in as little as a few weeks.
- Q: Can I do these exercises without a trainer? A: While they are designed to be safe, it’s always good to consult with a professional initially.
- Q: What type of chair is best for these exercises? A: A sturdy, non-wheeled chair is ideal. Stability is key!