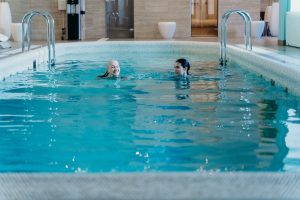
Dipping into the waters of pool exercises? If you’re a senior or have senior folks around, you’re in for a treat. Engaging in pool exercises is not only refreshing, but it also offers a plethora of health benefits. The buoyancy of the water reduces the stress on joints, making it an ideal environment for low-impact exercises.
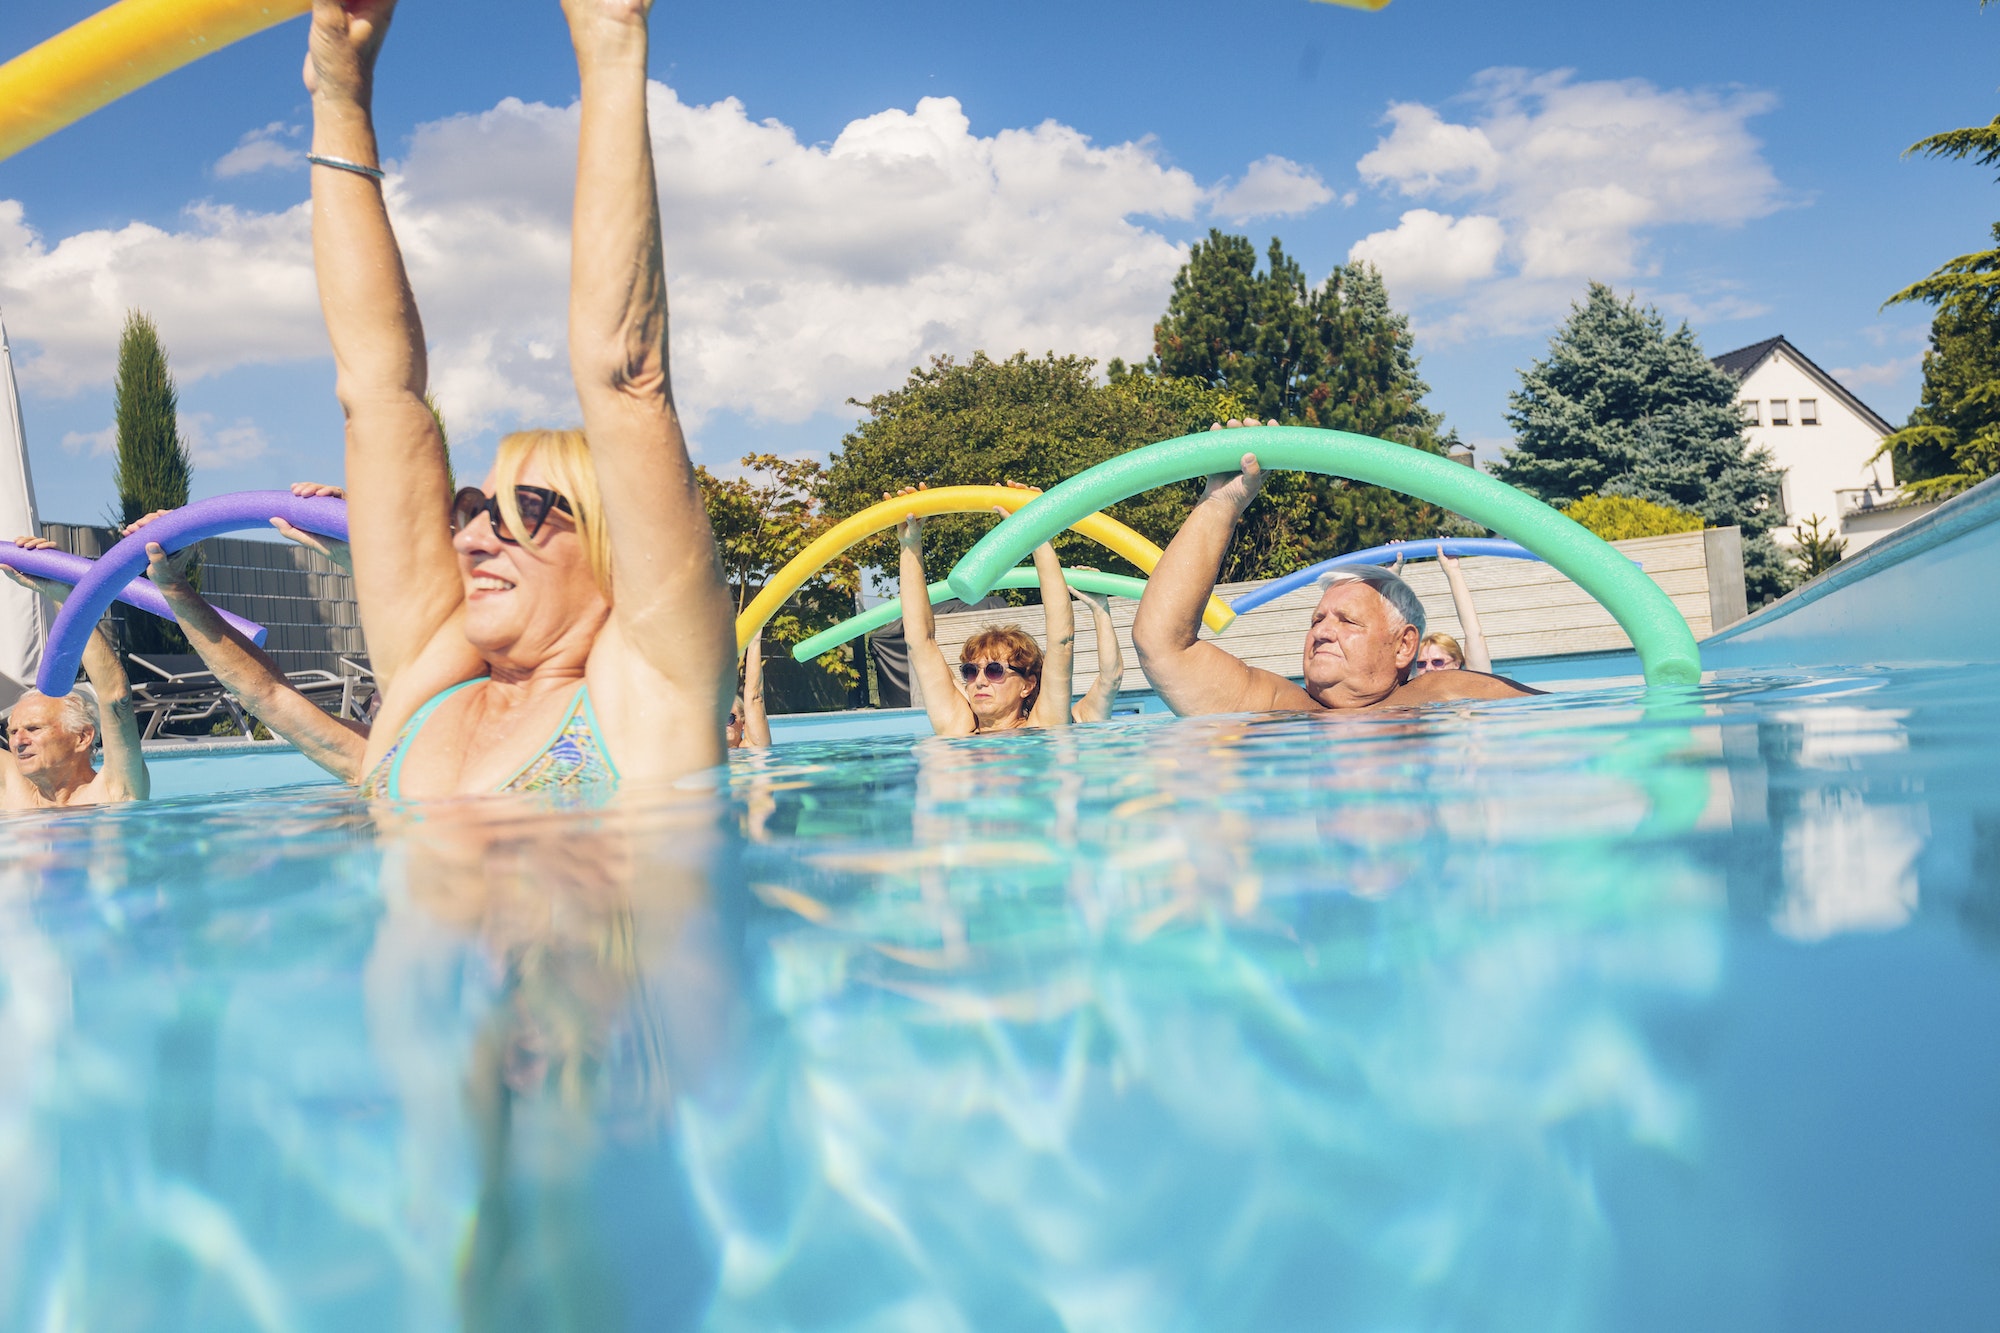
With a myriad of exercises to choose from, where should one begin? Right here! Dive into these 15 pool exercises for seniors, aimed at getting you or your loved ones moving and grooving.
Contents
- 1 Water Walking
- 2 Leg Lifts
- 3 Pool Planks
- 4 Floatation Jog
- 5 Water Push-ups
- 6 Torso Twists In Pool
- 7 Knee-to-Chest Exercise In Pool
- 8 Flutter Kicking In Pool
- 9 Arm Curls In Pool
- 10 Shoulder Shrugs In Pool
- 11 Water Tai Chi In Pool
- 12 Treading Water In Pool
- 13 Sidestepping In Pool
- 14 Pool Punches
- 15 Bicycle In Pool
- 16 Final Thoughts On Pool Exercises For Seniors
- 17 FAQs
Water Walking
Water walking, also colloquially known as aquatic walking, is an exercise that has been gaining traction for its immense benefits, particularly among those seeking a low-impact yet effective workout. So, what’s the big splash about? Let’s wade into the deeper end of this topic.
Origins and Popularity
The origins of water walking, like many exercises, are hard to pin down to a specific time and place. However, it’s likely that as long as there have been calm waters and folks aiming to stay fit, there have been individuals walking through water. Its popularity today can be attributed to an increased understanding of the physiological benefits of water-based exercises and the ease with which it can be incorporated into different lifestyles.
Mechanics of the Exercise
At its core, water walking is as simple as it sounds: one walks in the water. However, the resistance provided by the water means that each step requires more effort than it would on land. This resistance can be adjusted based on speed, stride, and even the depth at which one is walking. For those looking for added challenge, walking backward or sidestepping can increase the difficulty level.
Benefits Galore
- Low Impact: For those with joint issues or recovering from injuries, the buoyancy of water ensures that the stress on joints is significantly reduced. It allows for movement without the jarring impact of land-based exercises.
- Resistance Training: Water provides consistent resistance, ensuring that muscles are engaged throughout the walking process. Over time, this can lead to improved muscle tone and strength.
- Cardiovascular Health: As with any form of steady-state exercise, water walking can help improve cardiovascular health when done consistently and at a pace that raises the heart rate.
- Flexibility: The nature of water encourages a fuller range of motion. This, coupled with the resistance, can lead to improved flexibility over time.
- Caloric Burn: Despite its low-impact nature, the consistent resistance of water ensures that calories are burned during the activity, aiding in weight management.
- Mental Wellbeing: The gentle, rhythmic motion of walking in water can be therapeutic. The sounds of the water and the sensation of being submerged can also be meditative for many.
Incorporating Water Walking into Your Routine
Getting started with water walking is straightforward. All one needs is access to a pool, and possibly some water shoes for grip. While specialized equipment like aquatic dumbbells or flotation belts can enhance the workout, they aren’t necessary for beginners.
For those new to the exercise, starting in the shallow end and focusing on form can be more beneficial than diving into the deep end. Over time, as confidence and strength build, one can experiment with different techniques, speeds, and depths.
Leg Lifts
The delightful combination of water resistance and buoyancy makes pools an ideal setting for a variety of exercises. Among these, leg lifts have emerged as an especially effective workout, blending the challenge of resistance with the comfort of water’s gentle embrace. Here’s what you should know about making a splash with leg lifts in a pool.
The Aquatic Edge to Leg Lifts
Performing leg lifts in a pool adds an entirely new dimension to the exercise. The water’s resistance intensifies the move, and the buoyancy ensures a low-impact experience, which is particularly beneficial for those with joint issues or those recovering from injuries.
Variations of Pool Leg Lifts
- Frontal Leg Lifts: Stand in chest-deep water with a straight posture. Lift one leg straight out in front of you, then lower it back down. Switch legs. This targets the quadriceps and hip flexors.
- Lateral Leg Lifts: With a straight posture and standing in chest-deep water, lift one leg out to the side and then lower it. Alternate legs. This engages the abductors and outer thigh muscles.
- Backward Leg Lifts: Stand upright and extend one leg straight behind you, then bring it back down. This focuses on the hamstrings and glutes.
- Circular Leg Lifts: Lift one leg and make controlled circular motions in the water. This offers a comprehensive leg workout, targeting various muscles at once.
Perks of Pool Leg Lifts
- Amplified Resistance: Water provides a consistent and multi-directional resistance that amplifies the benefits of the leg lift, enhancing muscle tone and strength.
- Joint-Friendly: The buoyancy of water reduces stress on the joints, making it an ideal workout for those with arthritis or other joint concerns.
- Improved Balance: The unstable nature of water challenges the body’s proprioception, aiding in better balance and core stability.
- Caloric Burn: The combined effort of lifting against water resistance results in a higher caloric burn compared to traditional leg lifts.
- Cooling Comfort: The coolness of the water can be refreshing, especially after a rigorous set of leg lifts, making the workout feel less taxing.
Diving into the Routine
To begin with pool leg lifts, choose a spot in the pool where the water is around chest level. This ensures optimal resistance and safety. Focus on form, ensuring the core is engaged and movements are controlled. Given the water’s resistance, the pace might be slower than land-based leg lifts, but that’s where the challenge lies.
For added intensity, aquatic weights or floatation belts can be introduced. These tools can further challenge the muscles and make the workout more demanding.
Pool Planks
Taking the classic plank exercise and submerging it underwater, pool planks bring an innovative, aquatic twist to core training. Marrying the buoyancy of water with the static challenge of planking, this exercise offers a delightful balance of challenge and comfort. Dive in to discover more about pool planks and how they can make waves in your workout routine.
Understanding Pool Planks
At first glance, planking in water might seem contradictory. How do you maintain a static position in a constantly moving medium? That’s the magic of pool planks! Using a foam noodle or an aquatic dumbbell, the exercise involves leaning on the floating equipment while trying to maintain a straight body line, from head to toe, just like traditional planking.
The How-To of Pool Planks
- Position: Start by standing in the shallow end of a pool, water level up to your chest or shoulders.
- Equipment Placement: Hold a foam noodle or aquatic dumbbell with both hands. Extend it in front of you at chest level.
- The Plank: Lean forward, putting your weight on the equipment. Aim to keep your body straight, just like a regular plank. Your feet will naturally lift off the pool floor, and the water’s resistance will challenge your stability.
- Hold and Breathe: Try to hold the position, keeping your core tight and body aligned. Remember to breathe!
Benefits of Taking the Plank Poolside
- Enhanced Core Engagement: The unstable nature of water makes maintaining the plank position more challenging, thereby intensifying core engagement.
- Joint Protection: The buoyancy of water reduces the impact on the joints, making it an excellent option for those with joint concerns or those rehabilitating from injuries.
- Total Body Workout: Beyond the core, pool planks engage the shoulders, chest, and legs as they work against the resistance of the water.
- Caloric Burn: The added resistance of water amplifies the effort, leading to increased calorie consumption.
- Cooling Experience: The water’s refreshing embrace can make the exertion of planking feel less intense, allowing for longer holds.
Making Waves with Variations
- Single Leg Lift: While maintaining the plank position, lift one leg at a time. This challenges balance and engages the leg muscles more intensely.
- Side Pool Plank: Lying on one side, use the foam noodle under your forearm and try to lift your hips, mimicking a side plank.
- Rotational Twist: From the plank position, rotate your torso to one side and then the other, engaging the obliques.
Floatation Jog
We’ve all heard of water aerobics, water yoga, and even pool planks, but the world of aquatic exercises has another gem up its sleeve: the flotation jog. An amalgamation of floating and jogging, this unique exercise combines the best of both worlds, offering an experience that’s both invigorating and rejuvenating. Let’s dive into the dynamics of the flotation jog.
Grasping the Flotation Jog
The essence of a flotation jog is to simulate the act of jogging while being partially submerged in water. Supported by a flotation device or simply harnessing the buoyancy of water, participants experience a sensation akin to jogging on air.
How to Execute a Flotation Jog
- Gear Up: Use a flotation belt or vest to ensure you remain afloat without exerting excessive effort.
- Water Depth: Opt for water that’s chest to neck deep.
- The Jog: With the flotation device securely fastened, begin a jogging motion. Lift your knees, swing your arms, and simulate the act of running, all while floating in the water.
Advantages of the Flotation Jog
- Low Impact: The buoyancy of water minimizes the impact on joints, making it an excellent exercise option for those with joint problems or recovering from injuries.
- Resistance Training: Water offers natural resistance, ensuring that even a simple act like jogging becomes a full-fledged workout.
- Calorie Burn: The combined effort of staying afloat and moving against water can help burn calories efficiently.
- Cool Comfort: The water’s cooling effect can be refreshing, making the workout less tiring and more enjoyable.
- Improved Cardiovascular Health: Just like traditional jogging, flotation jogging can elevate the heart rate and improve cardiovascular health.
Adding a Twist to the Routine
- Intervals: Incorporate bursts of faster jogs followed by slower, recovery jogs.
- Directional Change: Jog forwards, then sideways, and even try moving backward. Each direction will engage different muscle groups.
- Add Movements: Incorporate arm exercises or even some upper body twists to make it a holistic workout.
Potential Challenges
- Maintaining Balance: The constant motion of water might pose a challenge to maintain balance initially. But with regular practice, one’s core strength and stability can improve.
- Overexertion: It’s easy to underestimate the effort required for a flotation jog due to the water’s cooling effect. Always listen to your body and avoid overdoing it.
Water Push-ups
From the tranquil lap of lakeshores to the furious roar of ocean tides, water has always been associated with tranquility and power. Similarly, push-ups, a classic emblem of fitness, represent strength and discipline. Combine the two, and you have water push-ups—a refreshing twist on the traditional push-up that challenges and rewards in equal measure. Let’s plunge into this innovative exercise that has fitness enthusiasts making a splash.
The Concept of Water Push-Ups
Water push-ups blend the resistance of water with the fundamental principles of a standard push-up. Performed at the edge of a pool, this exercise focuses on using the water’s resistance to challenge the muscles differently than land-based push-ups.
Executing the Perfect Water Push-Up
- Positioning: Begin at the edge of the pool, with your back to the water. Place your hands on the pool’s edge, shoulder-width apart.
- Depth Matters: Submerge yourself so that your arms are almost fully extended but remain slightly bent at the elbows. The deeper you are, the harder the exercise.
- The Push: Press down on the edge, lifting your body out of the water as you would in a regular push-up. Then, lower yourself back down, harnessing the water’s resistance.
Benefits of Choosing Water as Your Push-Up Platform
- Enhanced Resistance: Water provides consistent resistance, ensuring that both the upward and downward movements of the push-up are challenging.
- Joint-Friendly: The buoyant nature of water reduces the impact on joints, making it an ideal choice for those who might experience discomfort with traditional push-ups.
- Full-Body Engagement: Beyond the arms and chest, stabilizing yourself in water engages your core, offering a comprehensive workout.
- Therapeutic Environment: The therapeutic qualities of water add a soothing touch to the rigorous nature of push-ups, aiding in relaxation.
Turning Up the Tide: Variations of Water Push-Ups
- Single Arm Challenge: Try performing the push-up with a single arm for increased difficulty.
- Leg Lifts: As you push up, lift one leg out of the water, alternating legs with each repetition.
- Treading Push-Ups: Move away from the edge and try push-ups while treading water, relying entirely on arm strength to lift yourself up.
Things to Keep in Mind
- Safety First: Ensure that the pool’s edge is not slippery. A firm grip is essential to prevent any mishaps.
- Controlled Movements: Due to water’s resistance, movements will naturally be slower. Focus on control and form rather than speed.
- Stay Hydrated: It might seem counterintuitive given you’re surrounded by water, but exercising in the pool can be dehydrating. Keep a water bottle handy.
Torso Twists In Pool
The shimmering blue expanse of a pool isn’t just for laps and leisurely swims. It’s also the perfect setting for a range of exercises that benefit from the resistance and buoyancy of water. Among these, torso twists make a particularly delightful splash. When executed in the pool, this traditional core-strengthening exercise elevates its benefits and fun quotient. Let’s dive deeper into the world of pool-based torso twists.
The Aquatic Twist on Torso Twists
The essential principle of a torso twist remains unchanged in water: rotate the upper body while keeping the lower half relatively stable. However, water introduces added resistance, demanding more effort from your core muscles while also offering the gentle support of buoyancy.
Steps to Master Torso Twists in the Pool
- Get Positioned: Stand in chest-deep water with a straight posture, feet shoulder-width apart for stability.
- Arm Placement: Extend your arms out to the sides, at shoulder height. The water will resist against your palms and arms during the twist, enhancing the exercise.
- Twist Away: Keeping your lower body and hips stationary, rotate your torso to the left, feeling the resistance of the water. Return to the center and then rotate to the right.
Why Twist in the Pool?
- Amplified Resistance: The viscosity of water provides more resistance than air, challenging the core muscles to work harder with each rotation.
- Joint Protection: The buoyant properties of water lessen the impact on joints, making the exercise suitable for all age groups, especially seniors.
- Enhanced Stability Challenge: The constant motion of water tests your balance, giving secondary muscles like the legs and feet a workout as they stabilize your stance.
- Cool Comfort: The refreshing embrace of the water keeps you cool, allowing for extended workout sessions without overheating.
Aqua Variations to Try
- Treading Twist: While treading water in the deeper end, try the torso twist. This not only engages the core but also gives a comprehensive full-body workout.
- Floating Twists: Using a pool noodle or floatation belt, secure yourself in a floating position and then perform the torso twists.
- Partner Twists: Face a partner and hold hands, then twist away from each other. This adds a fun, interactive element and can increase resistance.
Safety and Considerations
- Steady Movements: Water naturally slows down motion, but always ensure that your twists are controlled and not jerky.
- Foot Grip: Pool floors can be slippery. Maintain a firm stance and consider pool shoes if needed.
- Breathing Pattern: It’s essential to maintain a regular breathing rhythm. Do not hold your breath during the twists.
Knee-to-Chest Exercise In Pool
Amidst the sun’s gentle shimmer on the pool’s surface, there lies a powerful tool for strength, endurance, and rehabilitation: water. Its resistance and buoyancy make it an exceptional medium for exercises, and one such stellar example is the knee-to-chest exercise. When executed in water, this traditional move gains a new dimension, amplifying its benefits. So, let’s wade into the depths of the knee-to-chest aquatic exercise.
Why Knee-to-Chest in the Pool?
The knee-to-chest exercise primarily targets the hip flexors, lower abdomen, and glutes. In water, due to its resistance, every upward pull of the leg works the muscles harder than on land, while the buoyancy ensures that there’s minimal stress on the joints.
Steps to Master the Aquatic Knee-to-Chest Exercise
- Finding Your Depth: Stand in water that’s chest-deep. This ensures that you have enough resistance while also being submerged for support.
- Starting Stance: Stand tall with your feet shoulder-width apart. Ensure a firm footing to prevent slipping.
- The Lift: With a straight back, slowly lift one knee towards your chest as high as comfort allows. You’ll feel the water’s resistance, making the lift challenging yet supportive.
- Return and Repeat: Lower the leg back down and repeat with the other leg. Alternate legs for a set number of repetitions.
Benefits of the Pool’s Embrace
- Increased Resistance: Water’s natural resistance makes the muscles work harder, intensifying the workout without needing weights.
- Joint Protection: Especially beneficial for those with joint concerns or undergoing rehabilitation, the water’s buoyancy reduces the risk of strain or injury.
- Enhanced Balance Training: Maintaining stability during the exercise improves balance and core strength.
- Cooling Effect: The refreshing nature of the pool means you can exercise longer without overheating.
Water-Powered Variations
- Double Knee Lift: For a greater challenge, try lifting both knees to the chest simultaneously. This demands more from the core and enhances balance training.
- Side Knee Lifts: Instead of bringing the knee straight up, lift it to the side to engage the outer thigh and hip muscles.
- Treading Lift: In deeper water, tread and lift your knees. This full-body workout engages the arms, core, and legs all at once.
Precautions in the Pool
- Maintain Grip: Pools can be slippery. Always ensure you have a stable footing, and consider wearing aquatic shoes for added grip.
- Stay Conscious of Posture: Keep the spine straight and core engaged. A poor posture can reduce the effectiveness of the exercise and risk strain.
- Hydration is Key: Exercising in water can mask how much you’re sweating. Always keep hydrated before and after your aquatic workout.
Flutter Kicking In Pool
The gentle undulations of a pool’s surface are not just mesmerizing to watch but also represent a playground for aquatic exercises. One movement that truly embraces the energy of these ripples is flutter kicking. This seemingly simple action is a powerhouse of benefits when done in water, turning an ordinary pool session into a potent leg and core workout. Dive with us into the rhythmic world of flutter kicking in the pool.
Understanding Flutter Kicking
Flutter kicking is a foundational technique in swimming, particularly in freestyle and backstroke. It involves rapid, alternating up-and-down leg movements, propelling the swimmer forward with grace and speed. But beyond its primary role in swimming, it can also be a standalone exercise for strengthening and endurance.
How to Perfect Flutter Kicking in the Pool
- Position Matters: Start by holding onto the pool edge or a floating kickboard. If using a kickboard, extend your arms and hold the board’s sides, keeping your body aligned.
- Leg Mechanics: With a slight bend in the knee, initiate the kick from the hips, keeping the legs relatively straight. Avoid bending the knees too much, as it reduces the efficiency of the kick.
- Fluidity is Key: The movement should be fluid, with alternating kicks in a continuous rhythm. Engage your core to keep the upper body stable.
- Breathing: Ensure a regular breathing pattern. If your face is submerged, use a snorkel or lift your head occasionally for air.
Reaping the Aquatic Rewards
- Leg Strength: The water’s resistance ensures your leg muscles, especially the quadriceps and hamstrings, get a thorough workout.
- Core Activation: Maintaining a horizontal position in the water requires engagement of the core muscles, promoting stability and strength.
- Cardio Boost: Continuous flutter kicking raises the heart rate, providing an excellent cardiovascular workout.
- Improved Swimming Technique: Regularly practicing flutter kicking can improve your overall swimming speed and technique.
Deep Dive Variations
- Vertical Flutter Kick: Instead of the traditional horizontal position, try flutter kicking in a vertical stance. Tread water and maintain an upright position, flutter kicking to stay afloat.
- Backward Flutter Kick: Challenge yourself by trying to move backward using only your kicks.
- Interval Kicking: Incorporate high-intensity intervals. Kick as fast as you can for 30 seconds, followed by a relaxed pace for a minute.
Safety Precautions
- Watch the Feet: Ensure you’re not scraping the bottom of the pool, which can lead to injuries.
- Stay Hydrated: Exercising in water can be deceptive; you might not realize how much you’re sweating. Drink water before and after your kicking session.
- Listen to Your Body: If you feel any strain, especially in the ankles or knees, ease off and adjust your technique.
Arm Curls In Pool
The gentle undulations of a pool’s surface are not just mesmerizing to watch but also represent a playground for aquatic exercises. One movement that truly embraces the energy of these ripples is flutter kicking. This seemingly simple action is a powerhouse of benefits when done in water, turning an ordinary pool session into a potent leg and core workout. Dive with us into the rhythmic world of flutter kicking in the pool.
Understanding Flutter Kicking
Flutter kicking is a foundational technique in swimming, particularly in freestyle and backstroke. It involves rapid, alternating up-and-down leg movements, propelling the swimmer forward with grace and speed. But beyond its primary role in swimming, it can also be a standalone exercise for strengthening and endurance.
How to Perfect Flutter Kicking in the Pool
- Position Matters: Start by holding onto the pool edge or a floating kickboard. If using a kickboard, extend your arms and hold the board’s sides, keeping your body aligned.
- Leg Mechanics: With a slight bend in the knee, initiate the kick from the hips, keeping the legs relatively straight. Avoid bending the knees too much, as it reduces the efficiency of the kick.
- Fluidity is Key: The movement should be fluid, with alternating kicks in a continuous rhythm. Engage your core to keep the upper body stable.
- Breathing: Ensure a regular breathing pattern. If your face is submerged, use a snorkel or lift your head occasionally for air.
Reaping the Aquatic Rewards
- Leg Strength: The water’s resistance ensures your leg muscles, especially the quadriceps and hamstrings, get a thorough workout.
- Core Activation: Maintaining a horizontal position in the water requires engagement of the core muscles, promoting stability and strength.
- Cardio Boost: Continuous flutter kicking raises the heart rate, providing an excellent cardiovascular workout.
- Improved Swimming Technique: Regularly practicing flutter kicking can improve your overall swimming speed and technique.
Deep Dive Variations
- Vertical Flutter Kick: Instead of the traditional horizontal position, try flutter kicking in a vertical stance. Tread water and maintain an upright position, flutter kicking to stay afloat.
- Backward Flutter Kick: Challenge yourself by trying to move backward using only your kicks.
- Interval Kicking: Incorporate high-intensity intervals. Kick as fast as you can for 30 seconds, followed by a relaxed pace for a minute.
Safety Precautions
- Watch the Feet: Ensure you’re not scraping the bottom of the pool, which can lead to injuries.
- Stay Hydrated: Exercising in water can be deceptive; you might not realize how much you’re sweating. Drink water before and after your kicking session.
- Listen to Your Body: If you feel any strain, especially in the ankles or knees, ease off and adjust your technique.
Shoulder Shrugs In Pool
The azure expanse of a pool isn’t merely for cooling off on hot days or leisurely swims. It can also be your aquatic gym, offering resistance and buoyancy that transform conventional exercises into exciting, effective workouts. One such beneficiary of the water’s dynamic properties is the arm curl. When done in the pool, this familiar gym movement gains new depth (pun intended). Let’s delve into the details of pool-based arm curls.
Drenching the Basics: Why Arm Curls in Water?
At its core, an arm curl is all about targeting the biceps, using resistance to strengthen and tone this muscle. The water’s natural resistance acts as an invisible weight, challenging the muscles without needing traditional gym equipment.
Steps to Master Aquatic Arm Curls
- Choose Your Depth: Immerse yourself in waist or chest-deep water. This ensures a balance of buoyancy and resistance.
- Arm Positioning: Extend your arms straight in front of you, palms facing up.
- The Curl: Without moving the upper arms, bend your elbows, drawing your hands towards your shoulders. Feel the water pushing against your motion.
- The Extension: Slowly extend your arms back to the starting position, again experiencing the water’s resistance.
Benefits of the Liquid Resistance
- Adaptable Intensity: The faster you move, the more resistance you encounter, allowing for a personalized intensity level.
- Joint-Friendly: The buoyant nature of water reduces stress on the joints, making it an excellent option for those with arthritis or joint concerns.
- Engages Secondary Muscles: The stabilizing effect of water engages other muscles, like the shoulders and core, ensuring a holistic workout.
- Therapeutic Environment: The calming effect of water, combined with exercise, can boost mood and reduce stress.
Splashing in Some Variations
- Pool Noodles: Use pool noodles or foam dumbbells to increase resistance. Grasp them in each hand and perform the curl.
- Underwater Push-Pull: With palms facing down, push the water down to your hips, then turn palms up and pull the water back to the starting position.
- Alternate Arms: Instead of curling both arms simultaneously, alternate them for a rhythmic workout.
Safety and Considerations
- Stay Grounded: Ensure you have a firm footing to prevent slipping or losing balance.
- Engage the Core: A strong core stabilizes the body, ensuring better posture and effectiveness during the exercise.
- Breathing is Vital: Maintain a consistent breathing pattern. Never hold your breath during exercise.
Water Tai Chi In Pool
In the heart of the pool, where water embraces and envelops, a dance emerges—one of mindfulness, fluidity, and strength. Water Tai Chi, an aquatic adaptation of the ancient Chinese martial art form, melds the harmonious moves of Tai Chi with the supportive and resistant properties of water. The result is a meditative workout that caters to both the body and soul. Let’s explore the depths of Water Tai Chi and its serene ripples in the aquatic realm.
Water Tai Chi: A Fusion of Elements
Water Tai Chi (or Aqua Tai Chi) builds upon the foundational principles of traditional Tai Chi—balance, coordination, and mindfulness—but executes them in water. This environment adds a unique dimension, wherein every move encounters the water’s gentle resistance and the body finds support in its buoyancy.
Sailing Through Water Tai Chi Moves
- Stance & Alignment: Start in waist or chest-deep water. Plant your feet firmly on the pool floor and maintain an upright posture. This grounded stance forms the base of all movements.
- Flowing Movements: Drawing from Tai Chi’s repertoire, execute moves like ‘Wave Hands Like Clouds’ or ‘Grasp the Sparrow’s Tail’. Each movement should be deliberate and slow, synchronized with controlled breathing.
- Circular Motions: Embrace circular, flowing motions, ensuring smooth transitions from one pose to another.
- Balance & Shift: Just like on land, the emphasis is on shifting weight, maintaining balance, and coordinating movements with breath.
Bubbling Benefits of Aqua Tai Chi
- Strengthening & Toning: The water’s resistance ensures that muscles work harder during each movement, leading to improved strength and tone.
- Joint Protection: The buoyant nature of water alleviates stress on joints, making the practice especially beneficial for those with arthritis or joint-related issues.
- Enhanced Flexibility: The combination of Tai Chi moves and the forgiving nature of water promotes flexibility and range of motion.
- Mindfulness & Relaxation: Executing Tai Chi moves in water enhances the meditative aspect, aiding in stress relief and mental well-being.
Variations & Ripples in the Routine
- Partnered Moves: Try synchronized Tai Chi sequences with a partner, adding a layer of coordination and camaraderie.
- Integrate Props: Use pool noodles or foam dumbbells to introduce additional resistance or aid in certain poses.
- Adapting Forms: Depending on the pool’s depth and your comfort, adapt traditional Tai Chi forms to be more suitable for water execution.
Navigating the Waters Safely
- Maintain Stability: Always ensure you have a stable footing to avoid slipping.
- Stay Aware: Even though Tai Chi is about closing off distractions, be aware of your surroundings to avoid collisions in a shared pool space.
- Temperature Matters: Ensure the pool temperature is comfortable. Extremely cold or hot water might hamper the relaxing benefits of the practice.
Treading Water In Pool
Treading water is the act of keeping oneself vertically afloat and upright in water using only the body’s movements. It’s an essential skill for swimmers, enabling rest without seeking the pool’s edge and a lifesaver in open water situations.
The Benefits of Treading Water
- Full-Body Workout: It engages multiple muscle groups simultaneously, including legs, core, and arms.
- Enhanced Stamina: Continuously treading water can dramatically improve cardiovascular fitness and endurance.
- Caloric Burn: Due to its full-body engagement, it’s an effective exercise for burning calories.
- Improves Balance & Coordination: The need to remain upright and afloat fosters better body coordination and balance.
- Mental Resilience: Just like in life, where we sometimes have to ‘tread’ through challenging times, this exercise teaches the value of perseverance.
Treading Variations: Adding Waves to the Routine
- Interval Training: Alternate between intense, fast-paced treading and slower, more relaxed periods.
- Hands-Up Challenge: Try treading water with hands held above the water’s surface, increasing the workout’s difficulty.
- Weighted Treading: Wear aquatic weights or hold a water-resistant weight to add an extra layer of challenge.
Safety Considerations in the Deep End
- Stay Near the Edge: When starting, remain close to the pool’s edge or a supporting structure to grab if needed.
- Rest When Needed: If feeling fatigued, it’s essential to take a break. Overexertion can lead to cramps or exhaustion.
- Begin in Shallow Depths: Until confident, practice in shallower water where you can easily stand if needed.
Sidestepping In Pool
In the midst of clear, calming waters, you find a new avenue to enhance your fitness – not by swimming lengths or diving deep, but by taking simple steps to the side. Sidestepping in the pool offers a refreshing twist to traditional water workouts, capitalizing on the pool’s resistance to amplify the benefits of this straightforward exercise. Let’s dive into the lateral world of sidestepping in the pool.
Sidestepping: A New Direction in Aquatic Fitness
Traditionally associated with dance or agility drills, sidestepping involves lateral movements, where one steps to the side followed by the other foot, maintaining a consistent rhythm. When transposed to the aquatic environment, sidestepping becomes both a resistance and a balance challenge, making it a multifaceted workout.
Embarking on the Sidestepping Journey
- Water Depth: Start in waist or chest-deep water, ensuring you have a good footing on the pool floor.
- Stance: Keep a slight bend in your knees, engage your core, and maintain an upright posture.
- The Step: Begin with your feet together. Step out to the side with one foot, and then bring the other foot to join it, maintaining a consistent pace.
- Arm Movement: While optional, moving your arms in opposition to your legs (similar to natural walking) can help with balance and add to the workout intensity.
Rippling Benefits of Pool Sidestepping
- Leg and Glute Workout: The water’s resistance challenges the leg muscles, particularly the quads, hamstrings, and glutes.
- Core Engagement: Staying upright and maintaining balance activates the core muscles, enhancing stability and posture.
- Low-Impact: Being in water reduces the strain on joints, making sidestepping ideal for all age groups and especially beneficial for those with joint concerns.
- Cardio Boost: Moving continuously can elevate the heart rate, introducing a cardiovascular component to the routine.
Creating Waves with Variations
- Resistance Tools: Use aquatic dumbbells or leg weights to increase the resistance and intensity of the exercise.
- Change of Pace: Introduce intervals by alternating between fast-paced sidestepping and a slower pace.
- Travel: Sidestep from one side of the pool to the other, turning around and repeating the process.
Safety Steps in the Pool
- Slip-Proofing: Pools can be slippery. Always ensure you have a stable footing, and consider wearing aquatic shoes for added traction.
- Awareness: Stay alert to other swimmers or pool users to avoid collisions.
- Stay Hydrated: The cooling effect of water can mask how much you’re sweating. Keep a bottle of water at the poolside and hydrate frequently.
Pool Punches
Punching might evoke images of boxing rings, sweat, and intense focus. But when transferred to the serene environment of a pool, it takes on a different dynamic. Pool punches offer a fun, engaging, and surprisingly effective way to combine strength training and cardio in a low-impact setting. Dive into the world of pool punches and discover how to pack a punch without throwing a splash.
Unveiling Pool Punches: What Are They?
Pool punches involve executing various punching techniques while submerged in water, typically up to chest or shoulder level. The water’s resistance provides a natural counterforce to your movements, amplifying the exercise’s intensity without the need for external weights.
Throwing the Perfect Pool Punch: A Step-by-Step Guide
- Water Depth: Position yourself in chest or shoulder-deep water. This ensures optimal resistance while allowing free arm movement.
- Stance: Adopt a boxer’s stance. Feet shoulder-width apart, knees slightly bent, and stay on the balls of your feet, ready to pivot.
- Execution: Start with your hands up, guarding your face. Extend one arm out in a punch, rotating the fist so the knuckles are horizontal at the end. Pull back and repeat with the other arm.
- Breathing: Exhale as you punch and inhale as you retract. Maintaining a rhythmic breathing pattern boosts stamina and ensures continuous oxygen supply.
Riding the Wave of Benefits
- Upper Body Toning: The resistance offered by water works against your punches, strengthening your arms, shoulders, and chest.
- Core Engagement: To throw a powerful punch in water, you’ll naturally engage and stabilize using your core muscles.
- Cardio Kick: As you increase the pace of your punches, your heart rate elevates, offering a solid cardiovascular workout.
- Joint-Friendly: Water’s buoyancy reduces stress on joints, allowing for a high-intensity workout without the usual wear and tear.
Variations to Keep the Waters Churning
- Combination Punches: Integrate jabs, crosses, uppercuts, and hooks for a diverse and comprehensive workout.
- Lower Body Integration: Incorporate kicks or knee raises between punches to engage the lower body.
- Speed Drills: Set intervals of rapid punches followed by slower, more deliberate punches.
Safety Precautions: Avoiding Ripples
- Avoid Overextension: Always be mindful not to fully extend or lock out your elbows when punching to prevent strain.
- Grip Matters: Consider wearing water gloves for added resistance and to prevent slipping during high-intensity sessions.
- Awareness: Especially in shared pools, be aware of your surroundings to prevent accidental collisions with fellow swimmers.
Bicycle In Pool
Swimming laps isn’t the only way to get a heart-pumping workout in the pool. Imagine blending the refreshing sensation of the pool with the dynamic action of cycling. The result? Pool bicycling! This innovative exercise uses the water’s natural resistance and buoyancy to create a challenging, fun, and low-impact workout. Let’s dive deeper into the refreshing spin on traditional cycling.
Decoding Pool Bicycling: What’s the Splash?
Pool bicycling, also commonly known as aqua cycling or underwater spinning, involves mimicking the motion of cycling while being submerged, typically in chest-deep water. While specialized aquatic stationary bikes exist for this purpose, many individuals also practice the motion freestanding in the pool without any equipment.
Mastering the Art of Pool Bicycling
- Water Depth: Start in chest-deep water. This depth ensures optimal resistance while enabling proper form and motion.
- Positioning: If not using a specialized bike, stand with your feet flat on the pool’s floor, hands either on your hips or out to the sides for balance.
- Cycling Motion: Lift both feet off the pool’s floor. Begin to pedal just as you would on a land bicycle, making sure to maintain a consistent, fluid motion.
- Breathing: Just like in traditional cycling, maintain rhythmic breathing. Inhale through the nose and exhale through the mouth.
Riding the Wave of Benefits
- Lower Body Workout: The resistance from the water targets the thighs, calves, and glutes, promoting muscle strength and endurance.
- Joint Protection: The buoyant nature of water reduces impact, offering a safer environment for those with joint concerns or recovering from injuries.
- Cardiovascular Boost: Consistent movement raises heart rate, contributing to cardiovascular health and endurance.
- Core Stabilization: Balancing in the water while executing the cycling motion engages the core muscles, enhancing balance and posture.
Variations to Keep Things Flowing
- Intensity Shifts: Alter between fast-paced pedaling and slower, more deliberate rounds.
- Directional Changes: Occasionally, pedal in reverse to challenge different muscle groups.
- Arm Involvement: Engage your upper body by moving your arms in a running motion or performing alternating arm lifts.
Safety Considerations in the Aquatic Lane
- Stable Start: Always ensure you’re comfortable with the depth and have a stable footing to begin with.
- Avoid Overexertion: The cooling sensation of the water might mask how hard you’re working. It’s essential to monitor your heart rate and fatigue levels.
- Stay Hydrated: Even in the water, sweating occurs. Keep yourself hydrated by having periodic water breaks.
Final Thoughts On Pool Exercises For Seniors
Engaging in pool exercises is like finding that sweet spot between fun and fitness. For seniors, it’s a gentle yet effective way to enhance flexibility, strength, and cardiovascular health. Remember, it’s never too late to start. So, you’re now armed with some of the best pool exercises for seniors.
FAQs
- Are pool exercises safe for seniors with arthritis?
- Yes, the buoyancy of water provides a low-impact environment making it suitable for those with arthritis.
- How often should seniors engage in pool exercises?
- Ideally, 3-4 times a week for about 30 minutes, but always consult with a healthcare professional.
- Do you need special equipment for these exercises?
- Some exercises might require pool noodles or water dumbbells, but many can be done without any equipment.
- Can these exercises help with weight loss?
- Absolutely! They provide cardiovascular benefits and muscle engagement which can aid in weight management.
- Is it necessary to know swimming for these exercises?
- No, most of these exercises can be performed in shallow water. But always ensure safety and have supervision if needed.